Roof Garden Design: Practical Strategies for Small Urban Spaces
You can turn a flat roof or small terrace into a leafy, useful outdoor room that fits your style and budget. Start by matching plants, containers, and seating to your roof’s sun, wind, and weight limits so your garden stays healthy and safe. Practical choices up front save time and money and give you a space you actually use.
Pick low-maintenance species, plan for drainage and irrigation, and use vertical or modular planters to maximize space without crowding. With a clear plan, your roof can become a quiet retreat, a kitchen garden, or a lively social spot that adds value to your home.
Key Takeaways
- Know your roof’s limits and plan around sun, wind, and load capacity.
- Choose easy-care plants and smart containers to simplify maintenance.
- Design for function first, then add seating and lighting to match your use.
Principles of Roof Garden Design
You will focus on plant choice, structure, light, drainage, wind management, and access. These elements control safety, plant health, and how useful the space will be.
Key Design Elements
Start with a clear purpose: recreation, food, habitat, or visual screening. That purpose guides plant selection, furniture load, and circulation paths. Choose low-maintenance plants if you want less watering and pruning; pick herbs, succulents, and drought-tolerant perennials for easy care.
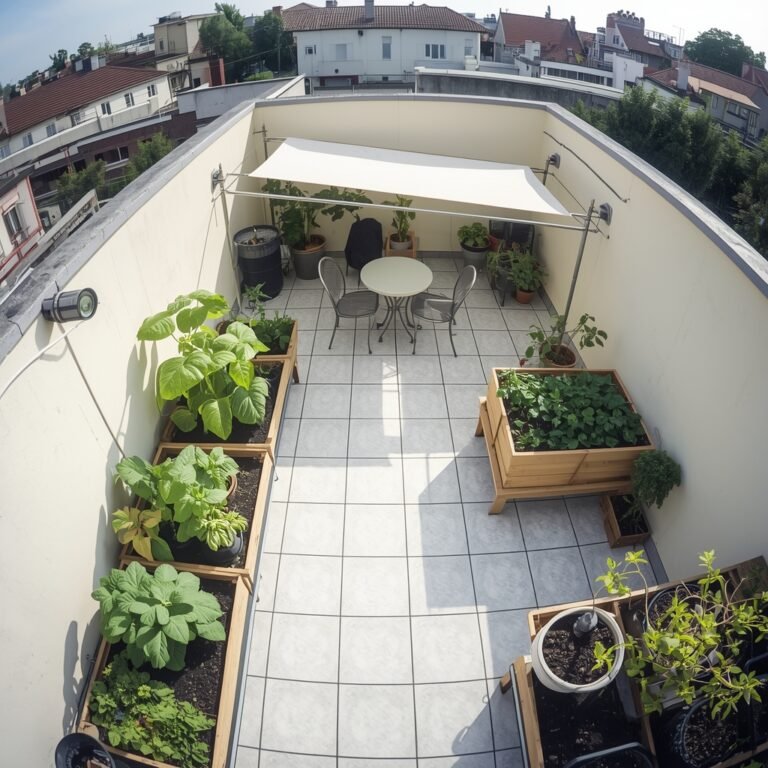
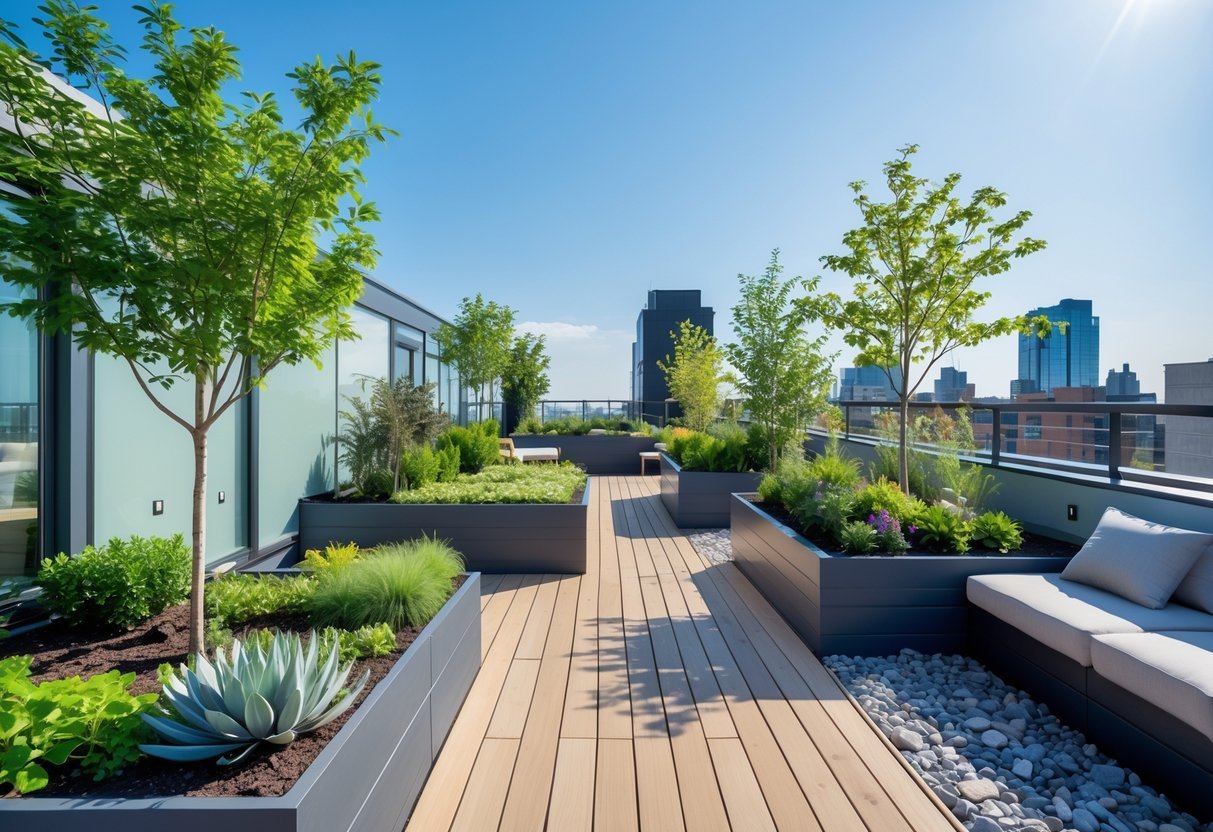
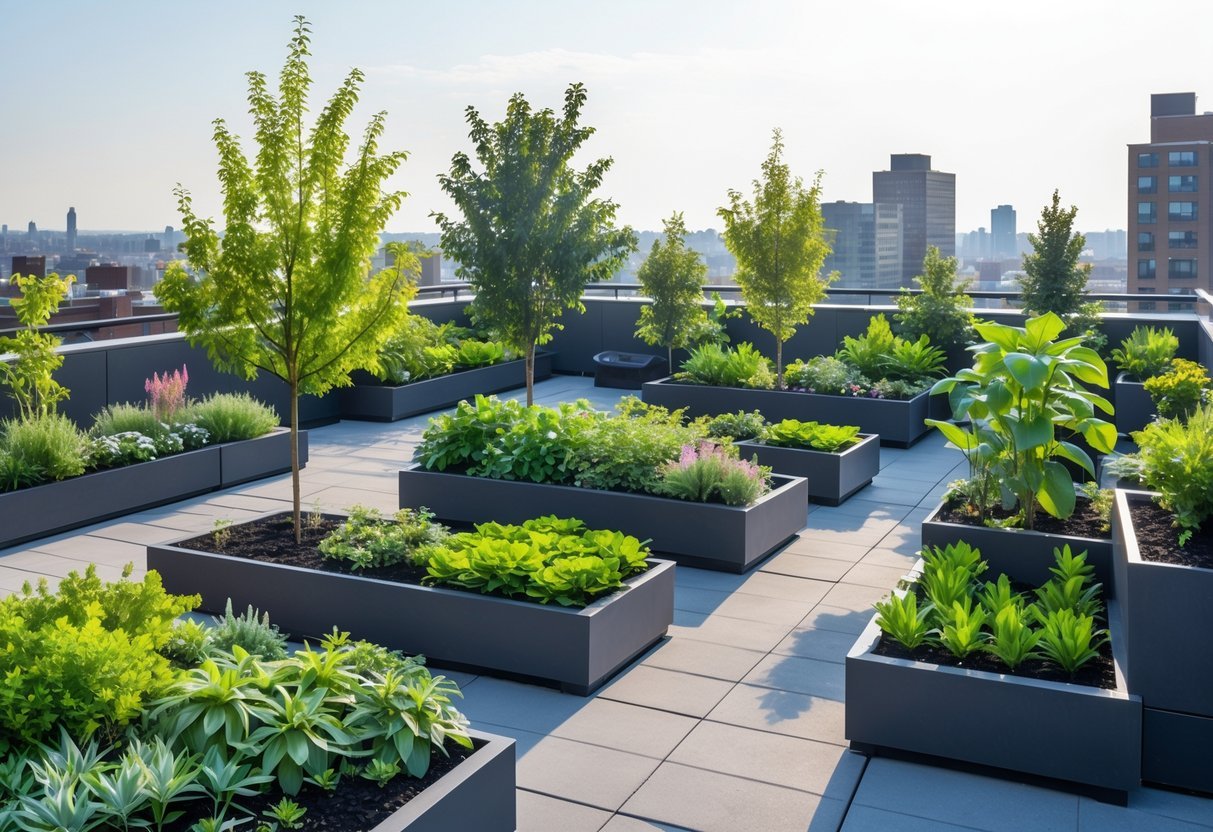
Plan zones: seating, planters, service access, and paths. Use raised beds or lightweight modular planters to define spaces and simplify replacement. Add irrigation and a drip system sized to plant needs; include a separate valve or zone for container plants.
Select materials for durability and weight: composite decking, lightweight pavers, and rustproof metal. Use non-slip surfaces for safety. Include storage for tools and easy access to water and electricity.
Structural Considerations
Confirm roof load capacity with a structural engineer before you start. You must know the live load (people, furniture, snow) and the saturated weight of planters and media. Lightweight growing media and modular trays reduce risk.
Check waterproofing layers and root barriers. Repair or replace membranes that show damage and add protection board above the membrane. Plan for drainage mats and scuppers so excess water leaves without pooling.
Design for service access. Provide safe routes for moving heavy planters, soil, and equipment. Consider edge protection: guardrails or parapets must meet local codes. Document modifications so future owners or contractors understand what was changed.
Sunlight and Microclimate Factors
Measure sun patterns across seasons before planting. Note hours of direct sun and areas shaded by adjacent buildings or structures. Match plants to those conditions: full-sun species for 6+ hours, part-shade for 3–6 hours, and shade plants for under 3 hours.
Account for wind, heat reflection, and thermal mass. Rooftops often have stronger winds that dry soil fast. Use windbreaks like glass panels or pergolas and position taller plants or screens to protect delicate species.
Plan irrigation and soil depth by microclimate. Place deeper, moisture-loving beds in cooler, shaded spots. Use sensors or timers to adjust watering after hot, windy days.
Planning and Preparation

Start by checking your roof’s load capacity, access, and sunlight so you can make choices that match the roof’s limits and your gardening goals. Plan for weight, water flow, and the materials you will use to avoid damage and costly fixes.
Site Assessment and Evaluation
You must confirm structural capacity before adding soil or planters. Hire a structural engineer to provide a live load limit in pounds per square foot (psf). Use that value to choose lightweight growing media and moveable planters if needed.
Measure sunlight at different times of day for at least a week. Note hours of direct sun, morning vs. afternoon exposure, and any shading from neighboring buildings. Match plant choices to those light conditions.
Check roof access, egress, and safety. Verify door widths, stair clearances, and weight limits for moving heavy pots or materials. Plan for maintenance access to equipment like HVAC units and vents.
Waterproofing and Drainage Systems
You must protect the roof membrane from roots and standing water. Install a continuous waterproof membrane rated for rooftop use, then add a root barrier over it. Seal roof penetrations with compatible flashing and flexible sealants.
Design drainage to avoid ponding. Include a layer for drainage (gravel, drainage mats, or modular trays) and slope to drains at 1–2% where possible. Add overflow outlets above the primary drains to handle heavy storms.
Include inspection and maintenance points. Place cleanouts at low points, and design removable trays or pavers to inspect the membrane. Plan a yearly inspection schedule and after major storms.
Material Selection
Choose lightweight, durable materials to stay within load limits and reduce maintenance. Use lightweight structural planters, aluminum or composite decking, and low-density growing media designed for roofs.
Pick plants for shallow soils and wind exposure. Opt for drought-tolerant perennials, sedums, grasses, and shallow-rooted shrubs. Group plants by irrigation needs and place larger containers near stronger structural points.
Select irrigation and fasteners that resist corrosion. Use irrigation lines sized to deliver even flow, and stainless steel or coated fasteners for rooftop humidity. Label valves and keep spare parts on hand.
Plant Selection and Layout
Choose plants that match your roof’s sun exposure, wind, and load capacity. Think about maintenance time, seasonal interest, and how plants will look together through the year.
Choosing Suitable Plant Species
Start by noting sun hours, prevailing wind, and maximum soil depth your roof supports. For full sun and shallow soil, pick drought-tolerant species like sedums, thyme, and ornamental grasses. For partial shade, choose hostas, ferns, or shade-tolerant perennials.
Match plant mature size to container or bed depth to avoid crowding. Use native species where possible for better survival and lower care needs. Avoid heavy, water-loving trees unless an engineer approves the load and root barrier.
Use a mix of evergreen and deciduous plants to keep winter structure and summer color. Prioritize plants with known rooftop performance in your climate zone.
Plant Groupings and Arrangement
Group plants by water need and sun tolerance to make irrigation and care easier. Put drought-tolerant clusters together and water-needy plants in deeper, moisture-retentive planters.
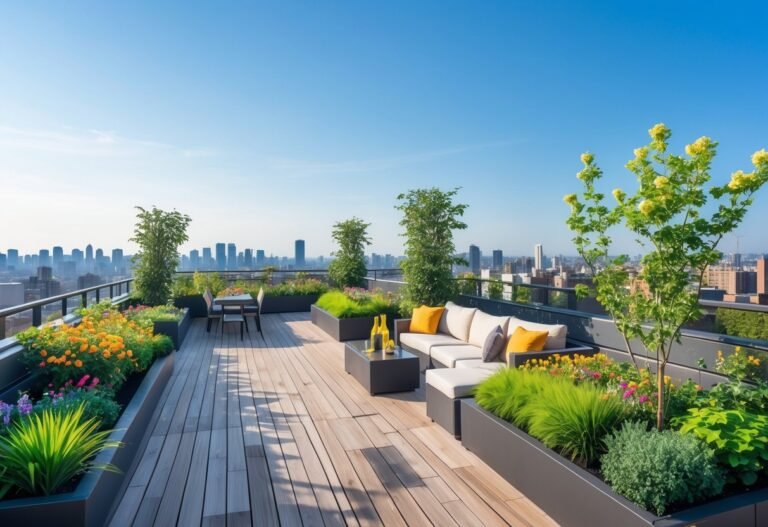
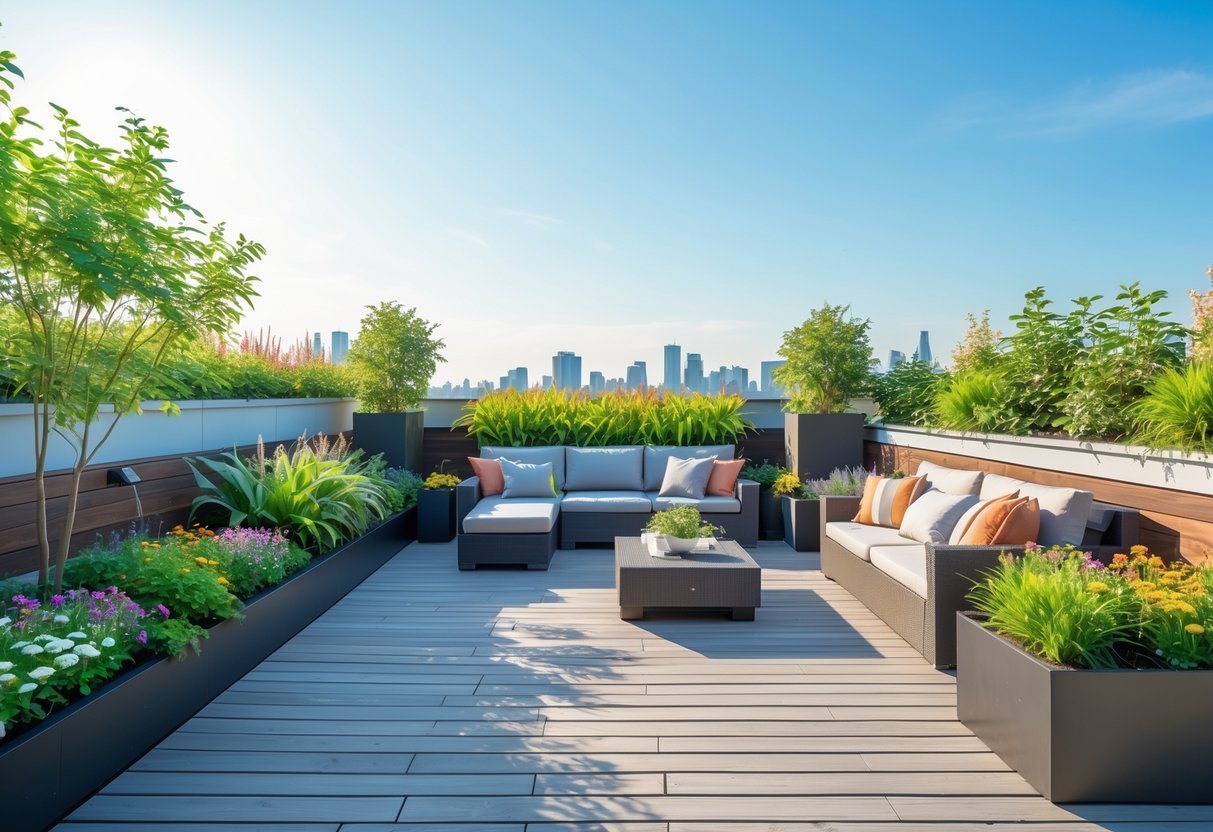
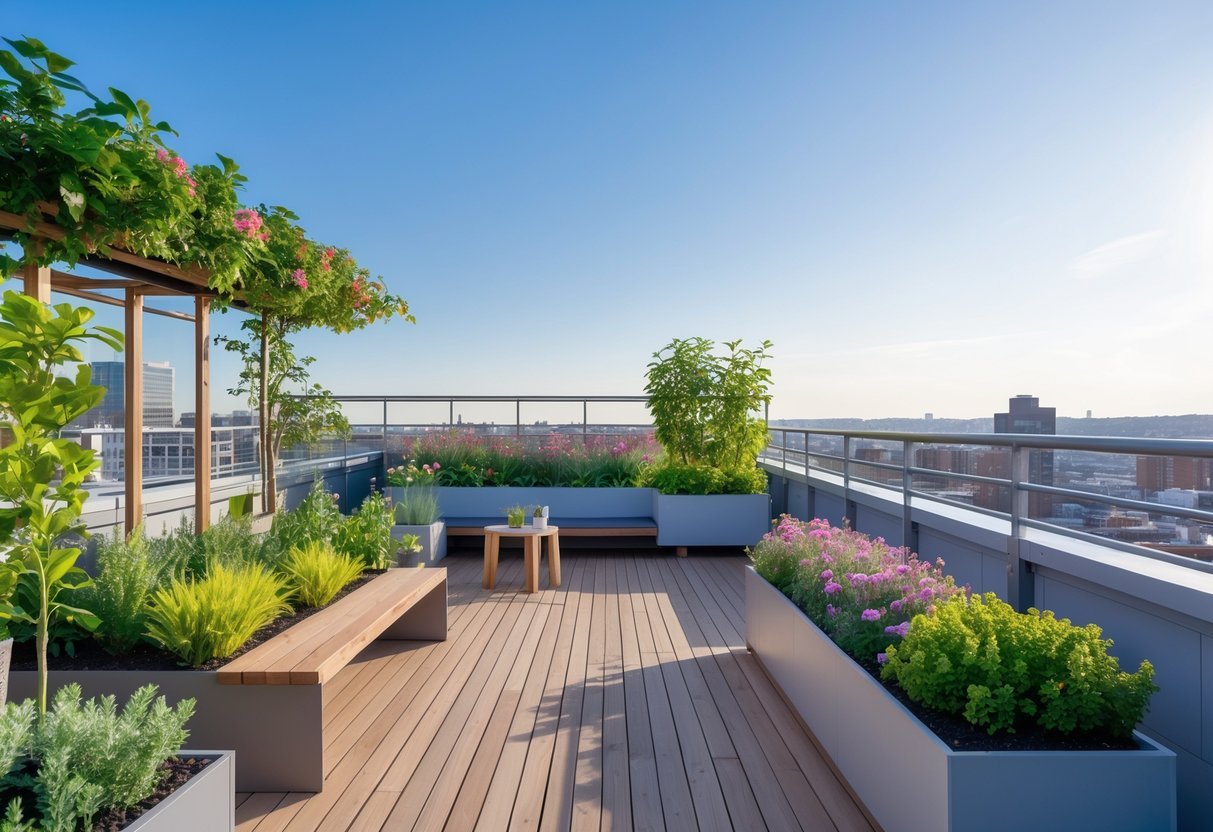
Design vertical layers: low groundcovers and succulents at the front, mid-height perennials in the middle, and small shrubs or feature plants at the back or near seating. This improves visual depth and wind protection.
Place heavier containers near strong structural points. Leave clear access paths for maintenance and drainage outlets. Use repeated plant motifs for cohesion and contrast leaf shapes or flower colors for interest.
Irrigation Strategies
Choose an irrigation method based on plant mix and roof access. Drip irrigation with pressure-compensating emitters gives precise water to individual pots and beds and reduces waste. Use separate zones for high- and low-water plants.
Install a simple timer or smart controller with a moisture sensor to prevent overwatering. For extensive green roofs with shallow substrate, rely on drought-tolerant plants and occasional hand watering after long dry spells.
Include an overflow plan: ensure excess water can reach drains safely. Protect irrigation lines from UV and freeze damage, and place shut-off valves where you can reach them for winterizing or repairs.
Enhancing Roof Garden Functionality
Plan for seating, pathways, water management, and light so your roof garden works for daily use, safety, and plant health. Choose durable materials, layered lighting, and low-impact systems to keep maintenance low and comfort high.
Hardscape Features and Furniture
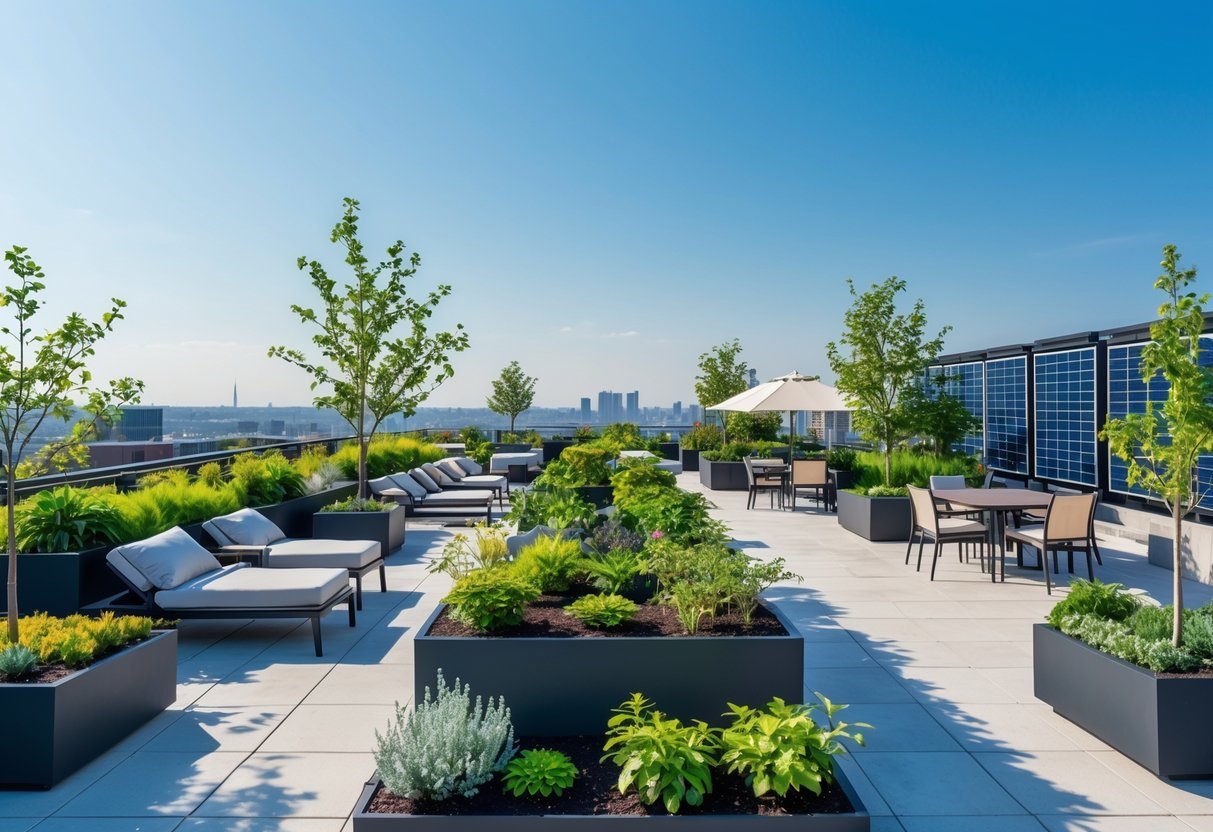
Pick materials that resist UV, moisture, and temperature swings. Use composite decking, sealed concrete pavers, or porcelain tiles on pedestals to allow drainage and access to waterproof membranes. Keep pathways at least 2.5–3 feet wide for two people to pass.
Anchor large planters and fixed furniture to the structure or use ballast systems to prevent wind lift. Choose lightweight planters (fiberglass or recycled plastic) for deeper soil needs and modular raised beds for herbs and vegetables. Include built-in benches with storage to protect cushions and tools.
Add a windscreen or trellis on the windward side to reduce gusts without blocking views. Design zones—dining, lounging, and planting—with durable rugs and weatherproof fabrics rated for outdoor use. Check load capacity with an engineer before adding heavy features like hot tubs or large planters.
Lighting Solutions
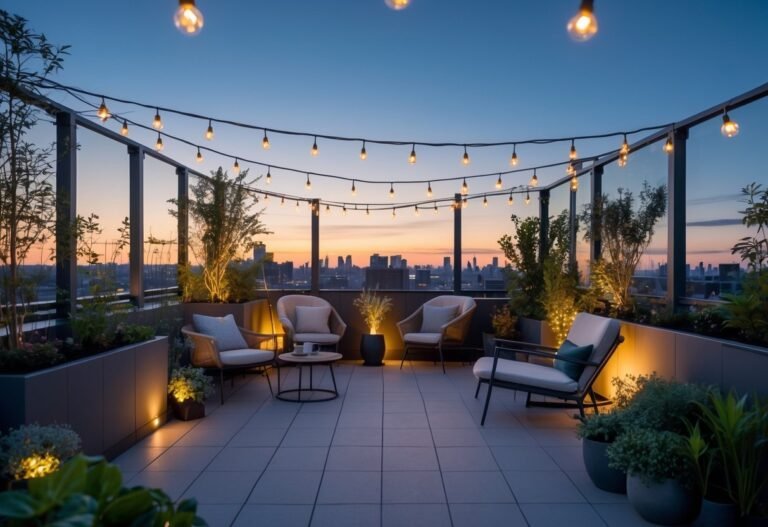
Lay out layered lighting: task lights for cooking and reading, ambient lights for mood, and accent lights for plants and steps. Use low-voltage LED fixtures to cut energy use and heat output. Choose warm color temperature (2700–3000K) for seating areas and slightly cooler lights for work zones.
Install step and path lights flush with pavers for safety. Use adjustable spotlights to highlight vertical gardens or specimen plants. Consider solar-powered bollards and string lights with integrated batteries to reduce wiring needs; hardwire power to critical zones through a licensed electrician.
Include timers, motion sensors, and dimmers to extend bulb life and manage light when you’re not present. Use IP65 or higher rated fixtures in exposed locations. Protect wiring in conduits and keep connections off the roof surface to avoid ponding risks.
Eco-Friendly Practices
Prioritize native, drought-tolerant plants to cut irrigation and support local pollinators. Group plants by water need into hydrozones and use drip irrigation with pressure-compensating emitters to deliver water directly to roots. Add a moisture sensor or smart controller to prevent overwatering.
Increase carbon capture and insulation with a green roof tray system or a mix of shallow sedum mats and deeper planted beds. Use recycled or sustainably sourced materials for decking and furniture. Install a rainwater-harvesting barrel or connect gutters to a cistern for irrigation use.
Improve soil mix with lightweight inorganic additives (pumice, perlite) and compost to retain moisture while keeping weight low. Use integrated pest management: encourage beneficial insects, hand-remove pests, and apply organic controls as a last resort.
Frequently Asked Questions
This section covers practical steps and choices: structure checks, plant picks by light and wind, weight limits, watering systems, usable layout tricks, budget items, and simple ways to make the space low‑maintenance and eco-friendly.
What are the key considerations when planning a roof garden?
Check your roof’s structural capacity with an engineer. Know the maximum live and dead loads so you can size planters, soil depth, and hardscape safely.
Verify waterproofing and roof membrane condition before installing anything. Add a root barrier and proper flashing to prevent leaks.
Plan for drainage and wind exposure. Use layered drainage, overflow paths, and wind-tolerant plants or screens where wind is strong.
Provide safe access and egress. Design wide, non‑slip paths and ensure maintenance access for irrigation and seasonal work.
How can I make a small roof garden feel spacious and inviting?
Use vertical planting and trellises to add green without losing floor area. Tall narrow pots and wall planters save space and draw the eye up.
Choose a limited color palette and repeating plant types. That creates visual unity and reduces clutter.
Include multi‑use furniture and clear pathways. A bench with storage and a small table keeps the area usable without crowding.
Add mirrors or light-colored hardscape to reflect light. This makes the space feel brighter and larger.
What are some modern trends in roof garden design?
Low‑maintenance native planting is popular for biodiversity and water savings. Designers favor drought‑tolerant mixes that support pollinators.
Modular planters and raised beds let you reconfigure the layout over time. They simplify maintenance and protect the roof surface.
Integrated irrigation and smart sensors cut water use. Automated drip systems with moisture sensors deliver water only where and when needed.
Edible gardening and micro‑orchards blend with ornamental design. People grow compact fruit trees, herbs, and vege beds in attractive containers.
How can I create a roof garden that is easy to maintain?
Pick plants suited to your sun, wind, and rainfall conditions. Native perennials, succulents, and ornamental grasses lower upkeep needs.
Install a drip irrigation system with a timer or moisture sensor. That reduces hand watering and helps prevent overwatering.
Use weed‑suppressing fabrics and mulch in planters. Mulch cuts watering frequency and limits weed growth.
Design for access. Make sure you can reach all plants for pruning, pest checks, and seasonal care without moving heavy items.
What elements contribute to a sustainable roof garden design?
Use a lightweight soil mix with good water retention and drainage to lower transport weight and water use. Include compost or organic matter to improve fertility.
Collect and reuse rainwater with a cistern or rain barrels where allowed. Graywater reuse can supplement irrigation if local rules permit.
Choose mostly native and drought‑tolerant plants to cut irrigation needs and boost local wildlife. Avoid invasive species.
Select recycled or sustainably sourced materials for planters and decking. Permeable paving reduces runoff and helps urban drainage.
How does one budget effectively for the creation of a rooftop garden?
Start with a structural assessment and waterproofing check — these are fixed costs you must cover first. Factor in any required roof repairs or reinforcement.
Itemize major costs: planters and soil, irrigation, drainage systems, plants, furniture, and labor. Get quotes for installation and ongoing maintenance.
Allow a contingency of 10–20% for unexpected repairs or changes. Roof conditions often reveal hidden issues once work begins.
Prioritize spending by staging the project. Begin with essential waterproofing, drainage, and a basic planting palette, then add furniture and decorative elements later.