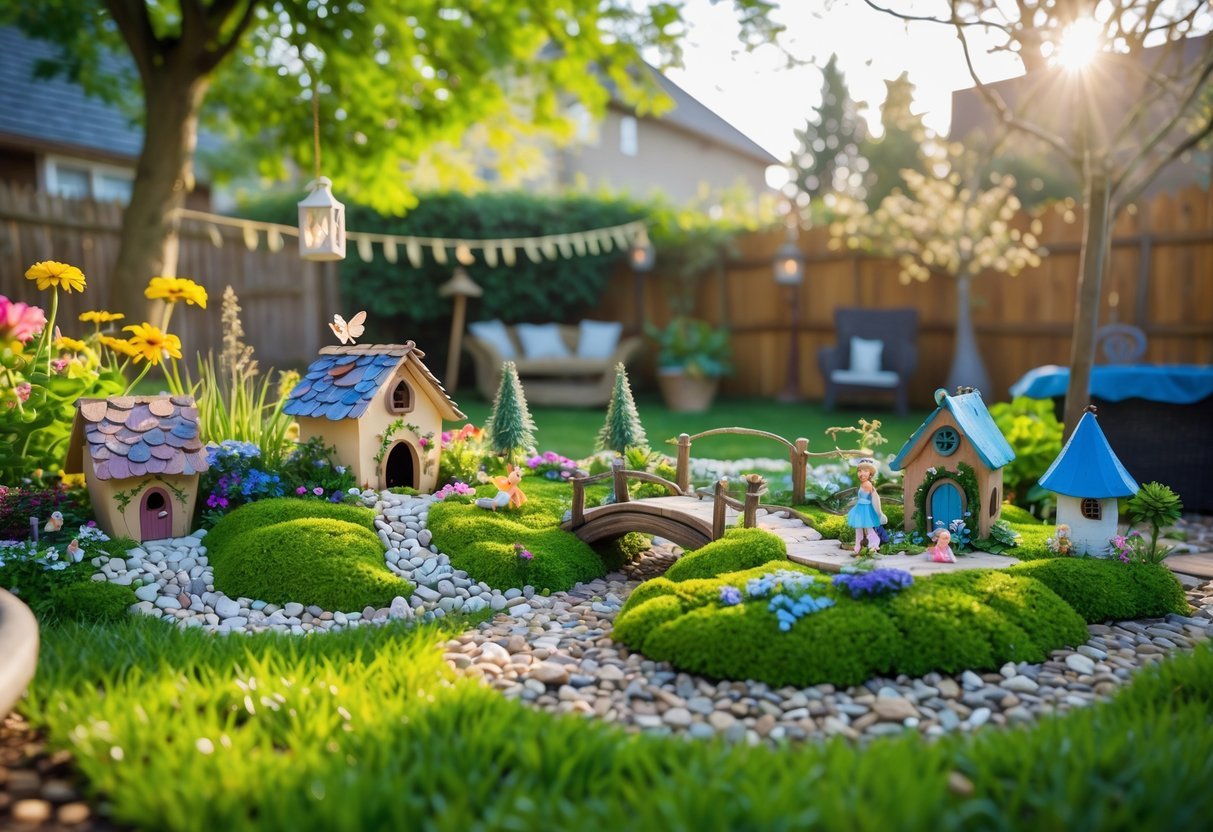
7 Fairy Garden Backyard Ideas to Transform Small Spaces Into Enchanting Retreats
You can turn a plain yard into a small, magical place that invites curiosity and calm. This article shows seven easy ways to add charm with tiny cottages, pebble paths, teacup homes, and simple DIY touches that fit any space or skill level.

Expect clear, practical ideas you can start this weekend to build a fairy garden that feels personal and easy to maintain. You’ll also find tips on lighting, seasonal accents, wildflower spots to attract pollinators, and how to keep your mini-world healthy as it grows.
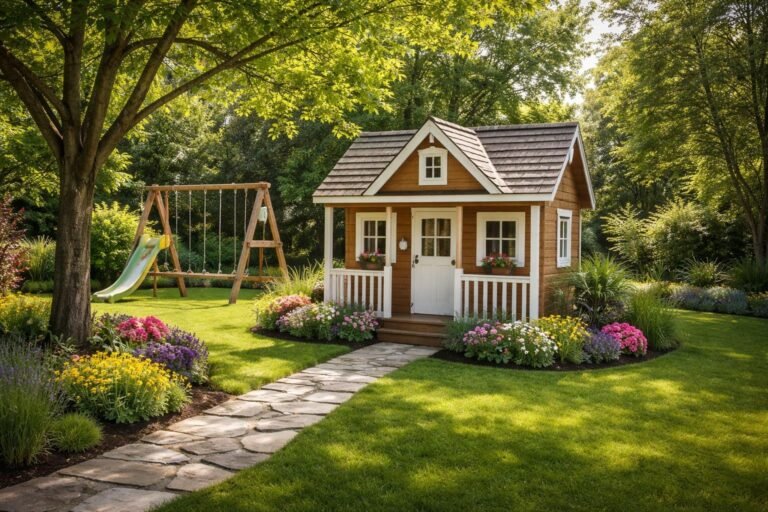
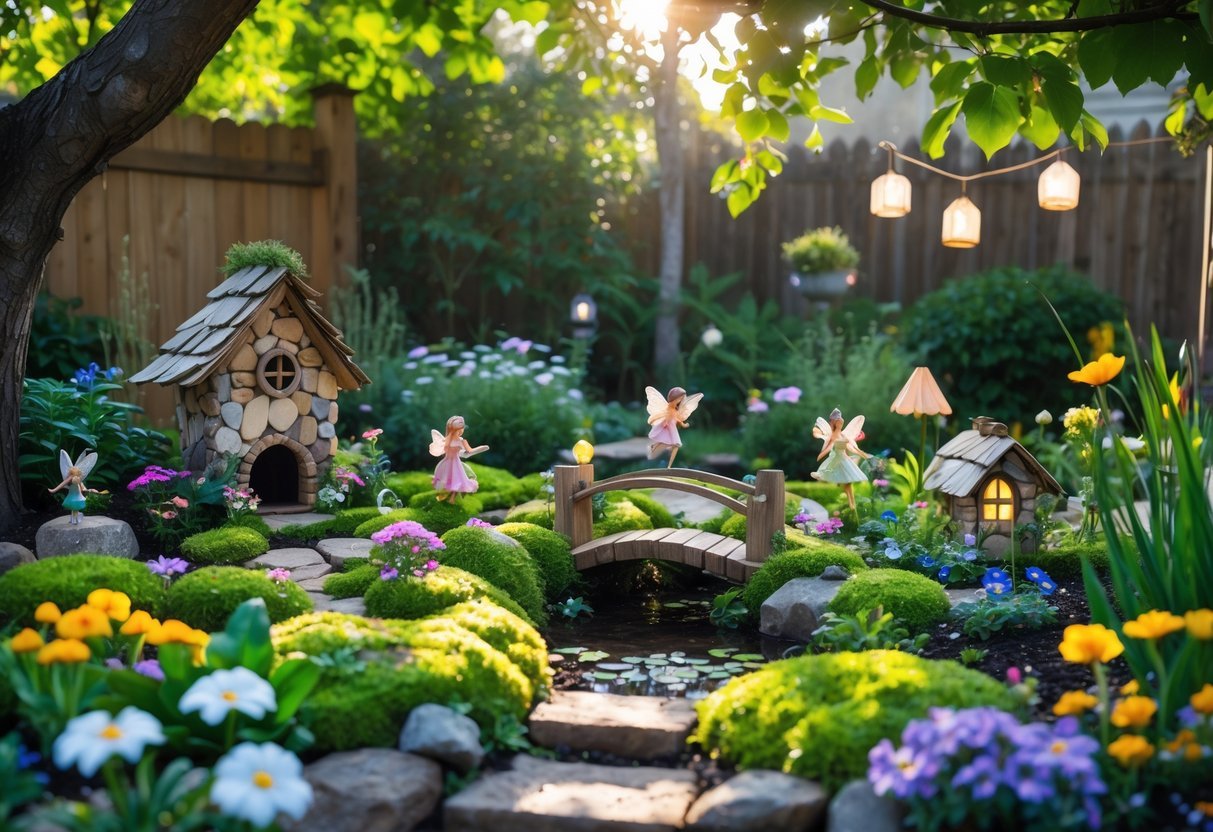
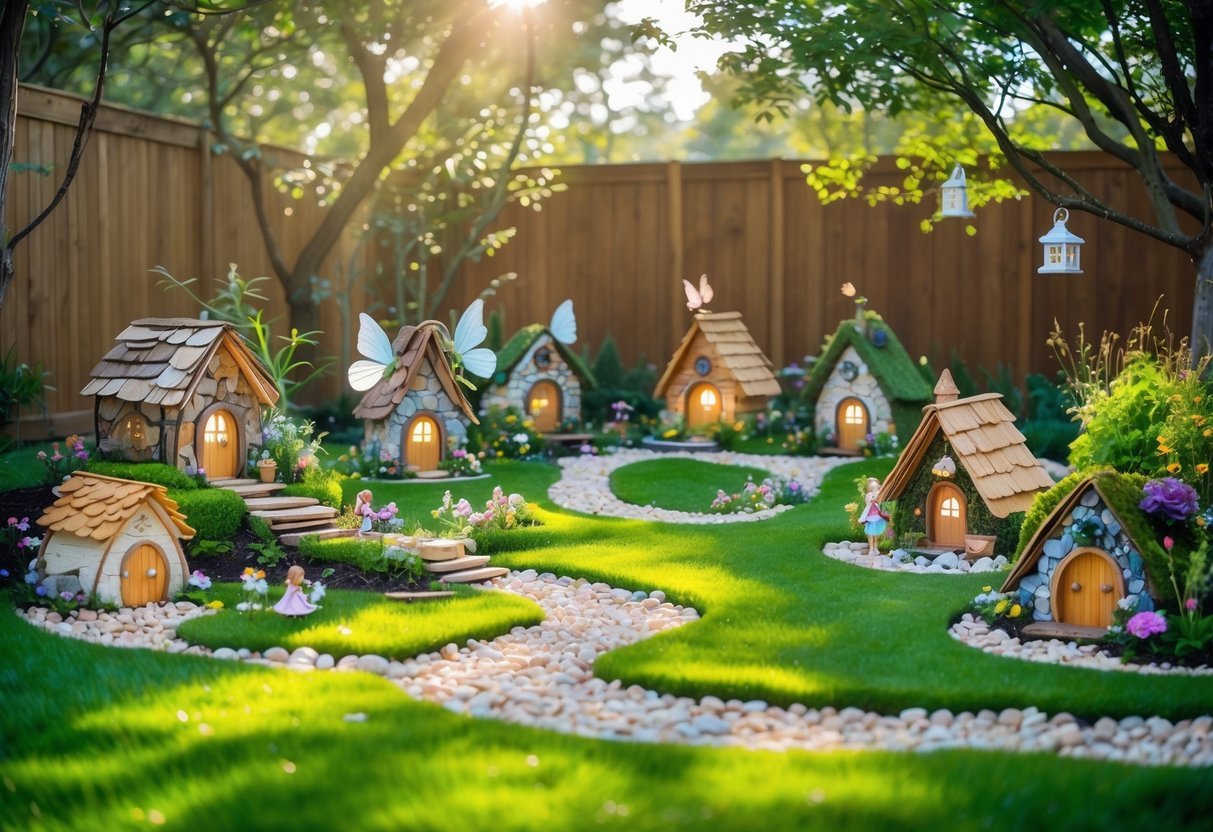
1) Miniature fairy cottages with natural materials
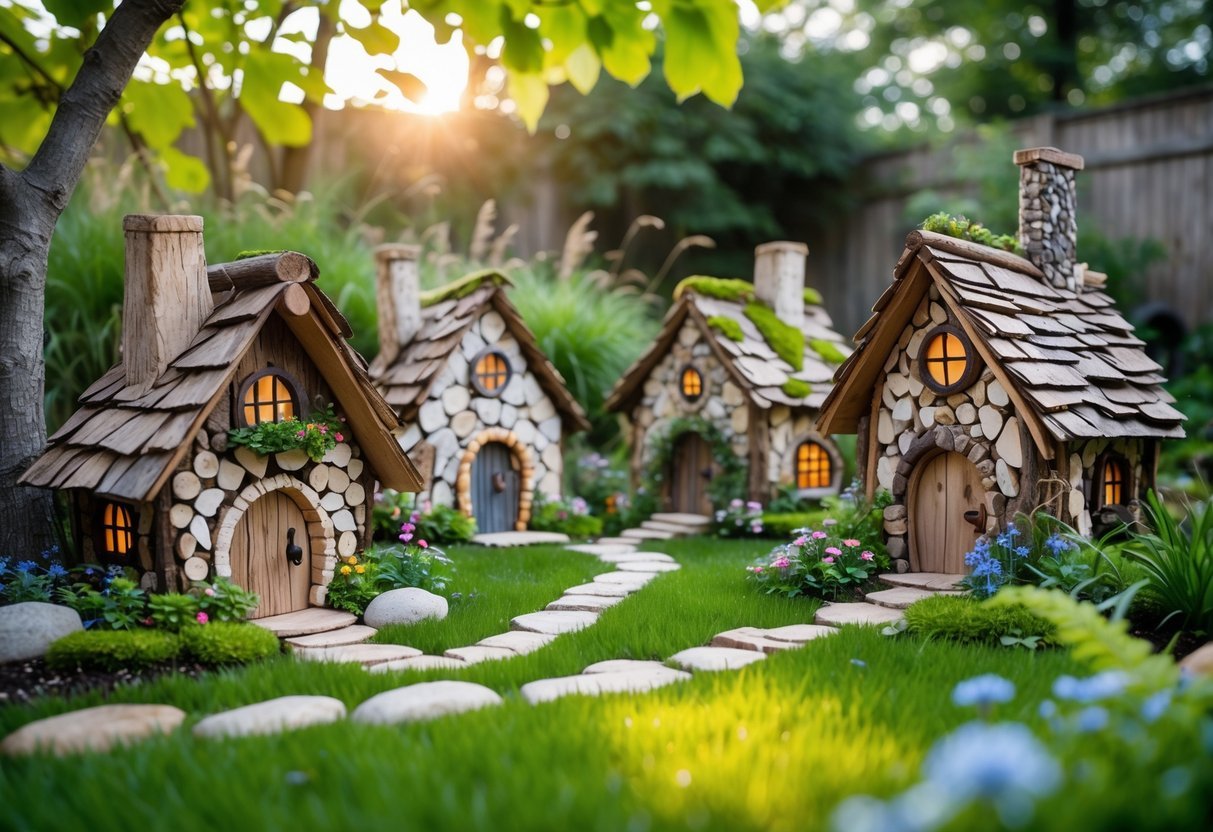
You can build tiny cottages using bark, twigs, pinecones, and pebbles from your yard.
Use a flat piece of bark for the base and stack small twigs to form walls; seal gaps with clay or moss.
Add a roof of layered bark or a thatch of dried grass for a rustic look.
Place the cottage near low plants or a tiny path to make it feel lived-in and to blend it with the garden.
2) Pebble pathways winding through tiny gardens
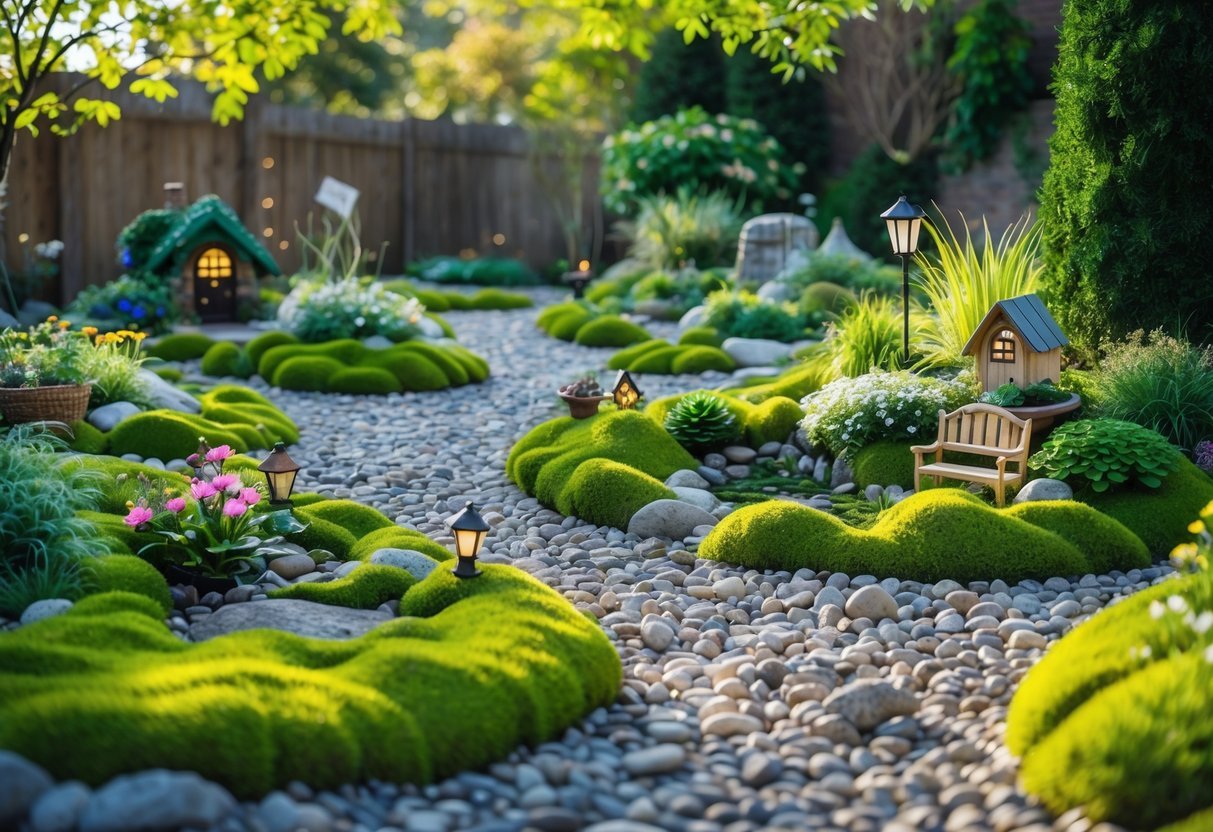
You can lay a pebble path to guide the eye and create scale in your fairy garden. Small stones, crushed shells, or tiny tiles work well for narrow walkways.
Keep the path narrow and curving to feel natural. Use glue or sand to hold pebbles in place so they stay tidy through weather and play.
Add a few stepping stones or a mini bridge to break the line and add interest. Low plants like moss or thyme at the edges soften the route and make it feel lived-in.
3) Teacup fairy homes on plant saucers
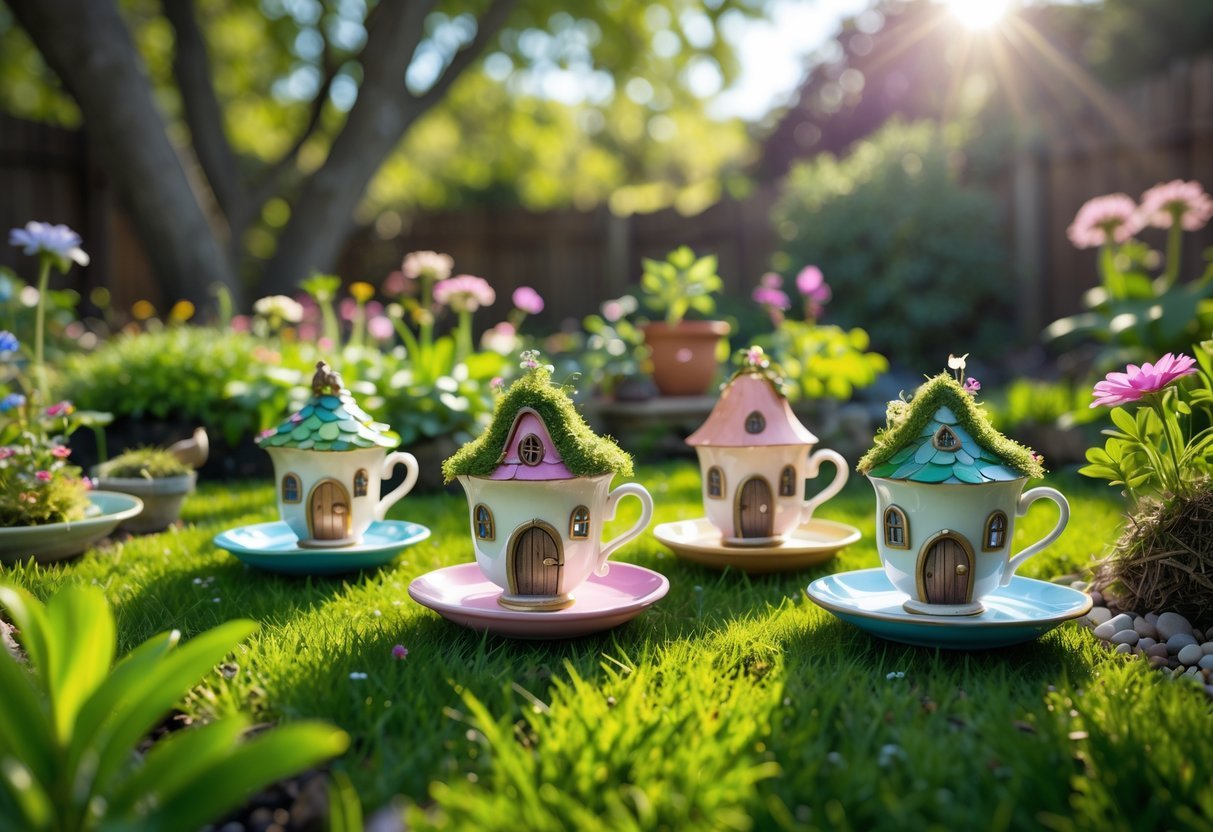
Place vintage teacups on wide plant saucers to build tiny fairy homes that stay tidy. Use potting soil and small succulents or moss to keep watering simple.
Add miniature doors, benches, or tiny pebbles for a clear focal point. Group several cups on one saucer to make a small village on a table or patio.
4) Whimsical twig chairs and furniture sets

You can craft tiny chairs, benches, and tables from twigs, strong glue, and simple tools. Work to scale so pieces look right with your plants and ornaments.
Seal wood with a clear, outdoor-safe finish to protect furniture from rain and sun. Add moss cushions or tiny cushions made from scrap fabric for comfort and charm.
Place sets near paths or under small shrubs to create cozy nooks. Use varied heights and styles to make the scene feel lived-in and fun.
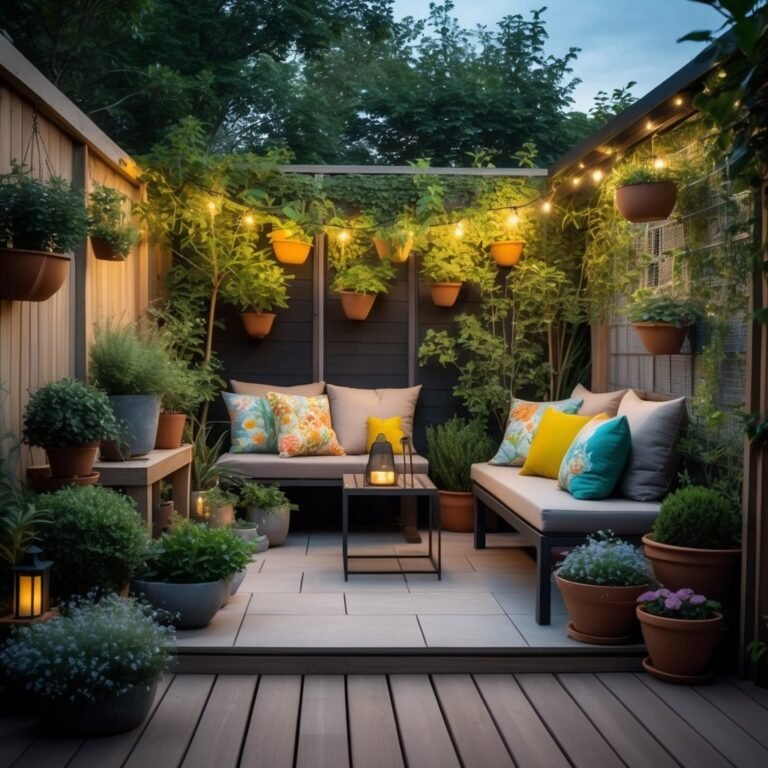
5) Glowing solar-powered fairy lanterns
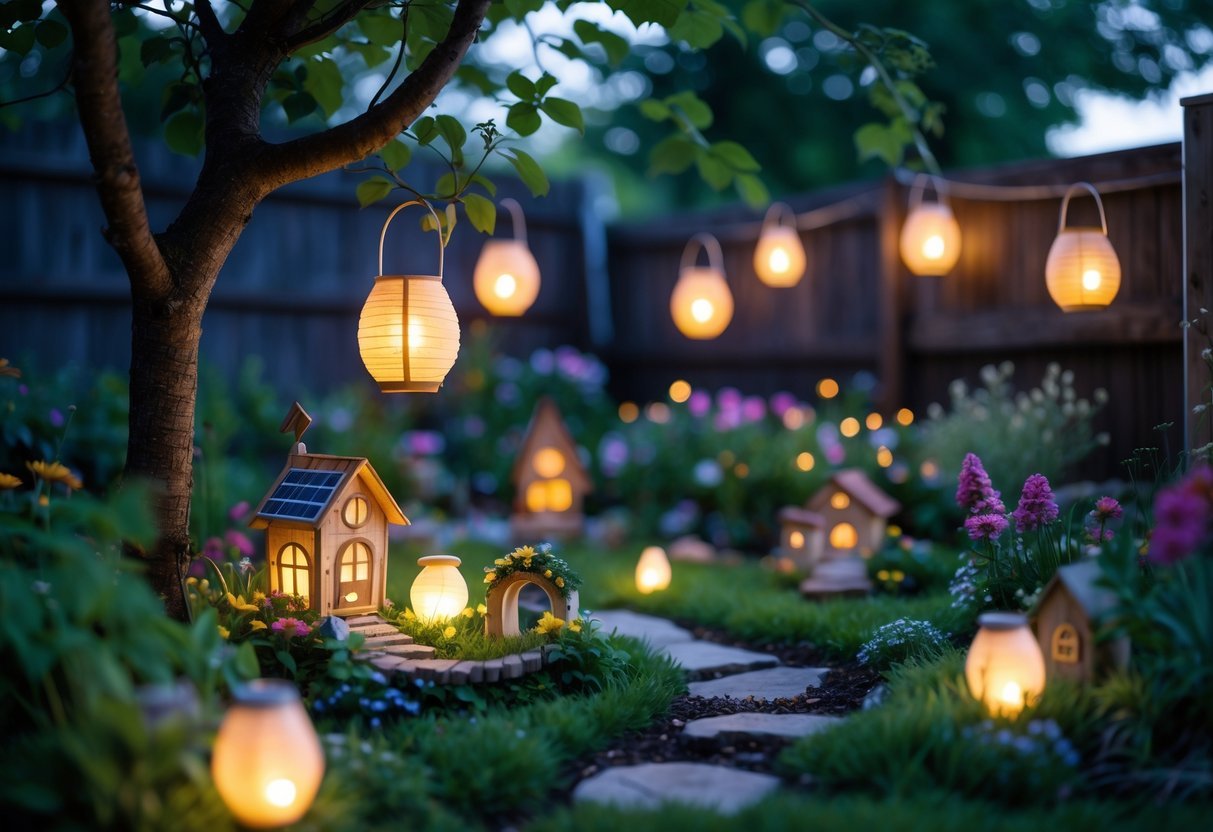
Place solar lanterns around pathways or in flowerbeds to add soft, steady light without wiring. They charge in sunlight and turn on at dusk, giving your garden a warm glow for hours.
Choose weatherproof designs with LED bulbs for long life and low energy use. Mix metal stakes, glass globes, and small hanging lanterns to create varied height and interest.
6) Faux pumpkin fairy houses for seasonal charm
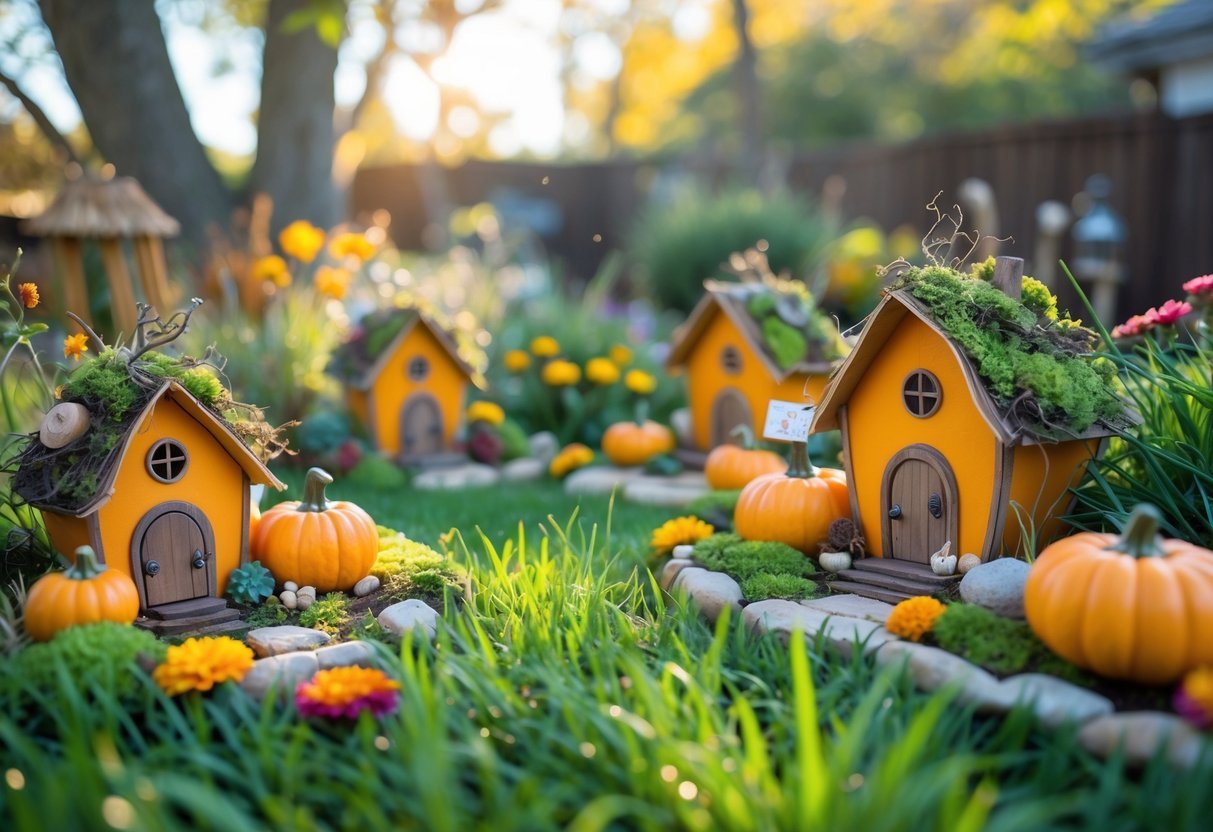
You can craft pumpkin-shaped fairy houses from foam, paper mache, or painted gourds for a long-lasting seasonal display.
They give autumn and Halloween vibes without rotting, so you reuse them year after year.
Add small doors, windows, and moss for a cozy look.
Place them on steps, in planters, or among plants to create little focal points in your garden.
7) Wildflower patches to attract pollinators
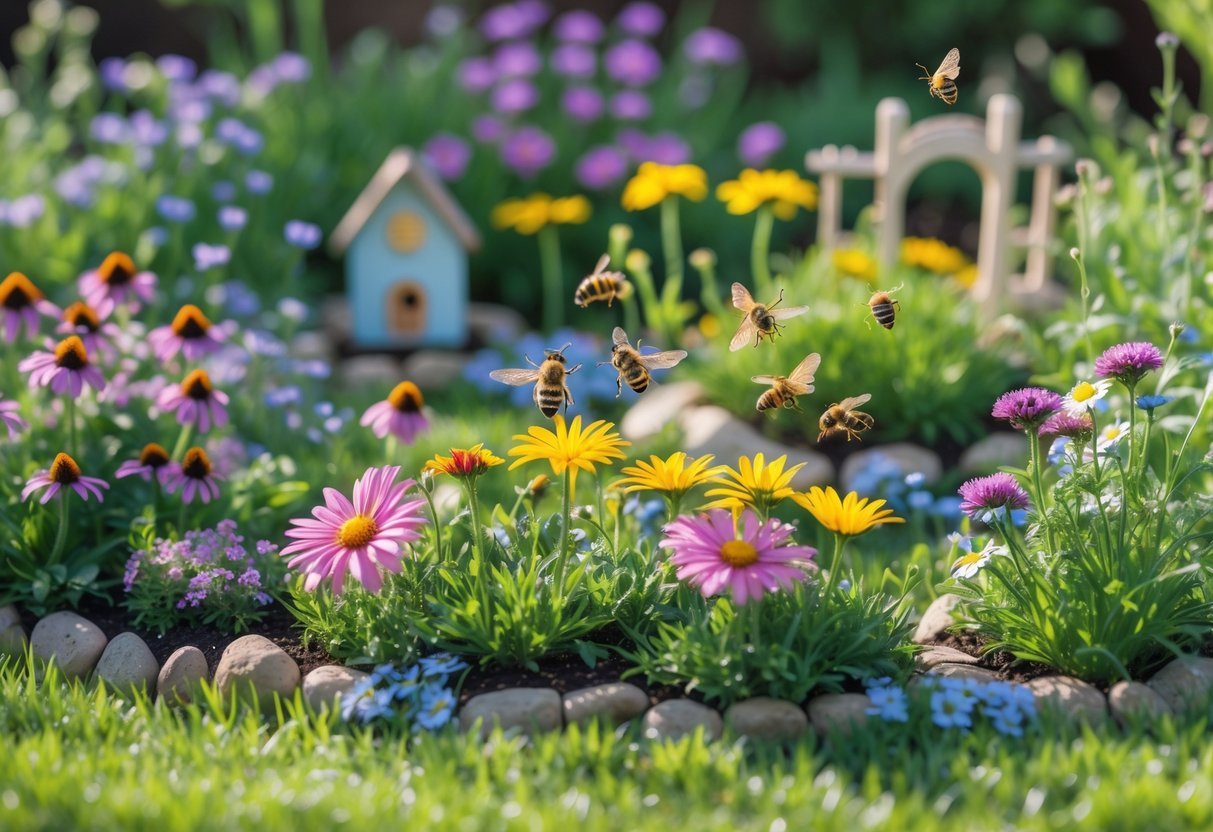
Plant small wildflower patches near paths or seating areas so you can enjoy the color and watch bees and butterflies visit. Choose native species that match your soil and sun; they need less care and support local pollinators.
Start with a prepared seedbed or scattered plug plants for quicker blooms. Water gently until established, then let the patch grow with minimal mowing to protect nesting insects.
How to Personalize Your Fairy Garden Backyard
You can shape a fairy garden that fits your space, taste, and budget. Pick a clear look, choose items that last outdoors, and add simple DIY pieces that make the space feel personal.
Choosing a Theme That Reflects Your Style
Decide what mood you want: cozy cottage, woodland glen, seaside cove, or bright tea-party. Match plants and colors to that mood—moss, ferns, and muted stones for woodland; succulents, driftwood, and shells for seaside. Limit your palette to two main colors plus one accent to keep the scene cohesive.
Think about scale. Use small plants and tiny furniture for a true miniature feel. If you prefer larger focal pieces, place one small house with a few oversized flowers around it. Consider who will use the space—kids might like bright, playful themes; adults may prefer calm, natural tones.
Selecting Materials and Ornaments
Choose materials that withstand weather: ceramic, resin, untreated wood, and marine-grade rope last better than basic paper or glued cardboard. For paths, use pea gravel, flat river stones, or broken terracotta pieces to avoid muddy tracks. Pick ornaments with drainage holes or that won’t trap water.
Group items by purpose: seating (mini benches, flat stones), structures (tiny doors, houses), and accents (lanterns, mirrors, tiny birdbaths). Use plant-friendly containers—shallow pots for small roots and deeper pots for mini shrubs. Label fragile or painted pieces for winter storage to protect them from frost.
Incorporating DIY Projects
Start with one small DIY to build confidence: a painted pebble path, a twig fence, or a teacup planter. Use household items: broken pottery becomes mosaic stepping stones; old spoons make tiny signs; wine corks become fence posts. Keep tools simple: hot glue, waterproof sealant, outdoor paint, and a small drill.
Plan projects around maintenance. Make removable pieces for seasonal swaps and easier cleaning. Photograph your layout before changes so you can recreate favorites. If children help, assign low-risk tasks like painting or planting to keep the project safe and fun.
Maintaining a Magical Fairy Garden
Keep your fairy garden tidy, healthy, and ready for the seasons. Focus on regular light pruning, soil checks, and smart storage for fragile decorations.
Seasonal Care Tips
Check soil moisture twice weekly in spring and summer; let the top inch dry before watering to avoid root rot. In hot weather, move sensitive potted miniatures into partial shade midafternoon and mist moss areas to keep them green.
Prune miniature plants monthly to maintain scale and prevent legginess. Remove spent flowers and trim stems with small scissors so pathways and tiny structures stay visible. Replace annuals each season and refresh potting mix every year to keep nutrients balanced.
In fall, cut back perennials to a few inches and clear fallen leaves from tiny paths to prevent mold. Mulch around plant bases with fine bark to insulate roots before the first hard freeze. In winter, bring fragile pieces indoors or cover them with breathable cloth if temperatures dip below freezing.
Protecting Decorations From Weather
Choose weatherproof materials for permanent pieces: treated wood, resin, ceramic, and metal with rust-proof finishes hold up best outdoors. Seal porous items like clay or untreated wood with a clear outdoor waterproof sealant to prevent cracking and mold.
Store delicate items, LED lights, and fabric accents indoors during heavy rain or snow. Use plastic bins with lids and label them by season so you can swap pieces quickly. For items that must stay out, anchor them with small stakes or landscape glue to stop wind from knocking them over.
Inspect decorations monthly for chips, rust, and loose paint. Touch up finishes with outdoor-rated spray paint and replace broken glass or sharp edges immediately to keep your garden safe for kids and pets.
Frequently Asked Questions
This section answers practical how-tos: fitting mini cottages into tight corners, saving money with reused items, choosing hardy low-care plants, adding grown-up touches like seating and lighting, planning large layouts with paths and zones, and avoiding common build mistakes.
How can I design a fairy garden for a small backyard space?
Focus on vertical and container solutions to save ground room. Use teacup fairy homes on plant saucers, hang small planters, and mount tiny shelves or fence sections on walls.
Place miniature cottages and twig furniture in a single focal container or raised planter. Add a short pebble pathway and a few low plants to create depth without clutter.
What are some cost-effective ways to create a fairy garden?
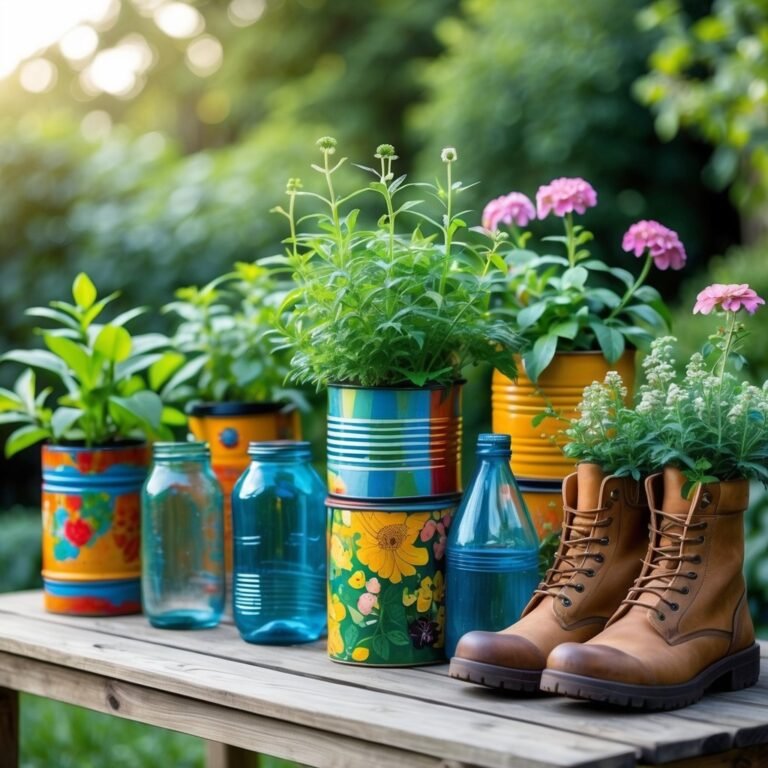
Repurpose household items like teacups, jars, and old toys for houses and furniture. Use collected pebbles and branches instead of store-bought miniatures.
Buy starter plants or divide existing ones from your yard to cut plant costs. Choose solar-powered fairy lanterns for cheap long-term lighting without wiring.
Which plants are best suited for a low maintenance fairy garden?
Choose hardy, small-growing plants such as sedum, thyme, dwarf mondo grass, and small succulents. These need little water and stay compact.
Use native groundcovers and small shrubs to reduce pruning and watering. Group plants with similar light and water needs to simplify care.
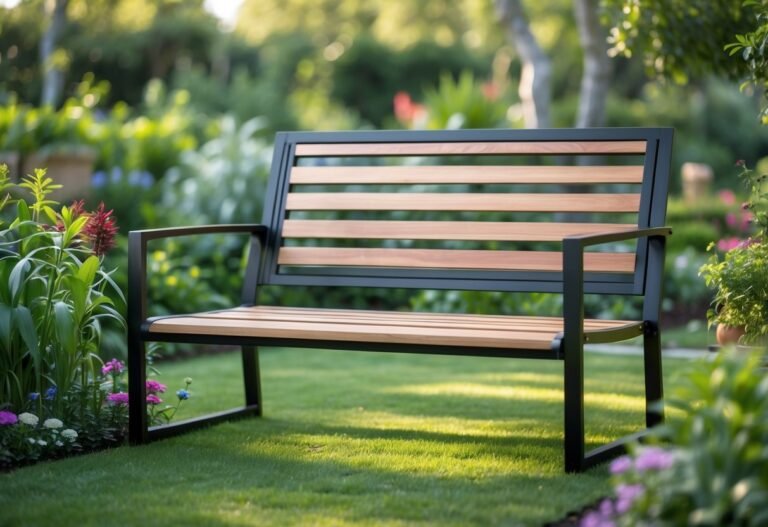
What features can I include to make an adult-friendly fairy garden?
Add comfortable seating like a small bench or a low bistro chair for relaxation. Include subtle lighting with solar lanterns and a real gravel or stone pathway for easy walking.
Consider durable materials—stone, metal, or treated wood—for furniture and structures. Incorporate a small herb patch or scent garden for sensory appeal.
How do you properly lay out a large outdoor fairy garden?
Divide the area into zones: a housing cluster, a path network, and a planted woodland or meadow. Use pebble pathways to link zones and guide movement.
Create scale by grouping several miniature cottages together and varying plant heights. Add focal points—like a larger central cottage or a solar lantern cluster—to anchor the design.
What are the most common mistakes to avoid when constructing a fairy garden?
Avoid overcrowding with too many miniatures; it looks cluttered and hides plants. Don’t mix plants with different water needs in the same container.
Skip fragile, non-weatherproof materials for outdoor builds, especially in exposed areas. Plan for access so you can water, prune, and replace elements without damaging the layout.